This took quite a while to figure out, mainly because I wanted to get it up and running in Swift using Core Image and CIColorCube.
@Miguel’s explanation is spot on about the way you need to replace a “Hue angle range” with another “Hue angle range”. You can read his post above for details on what a Hue Angle Range is.
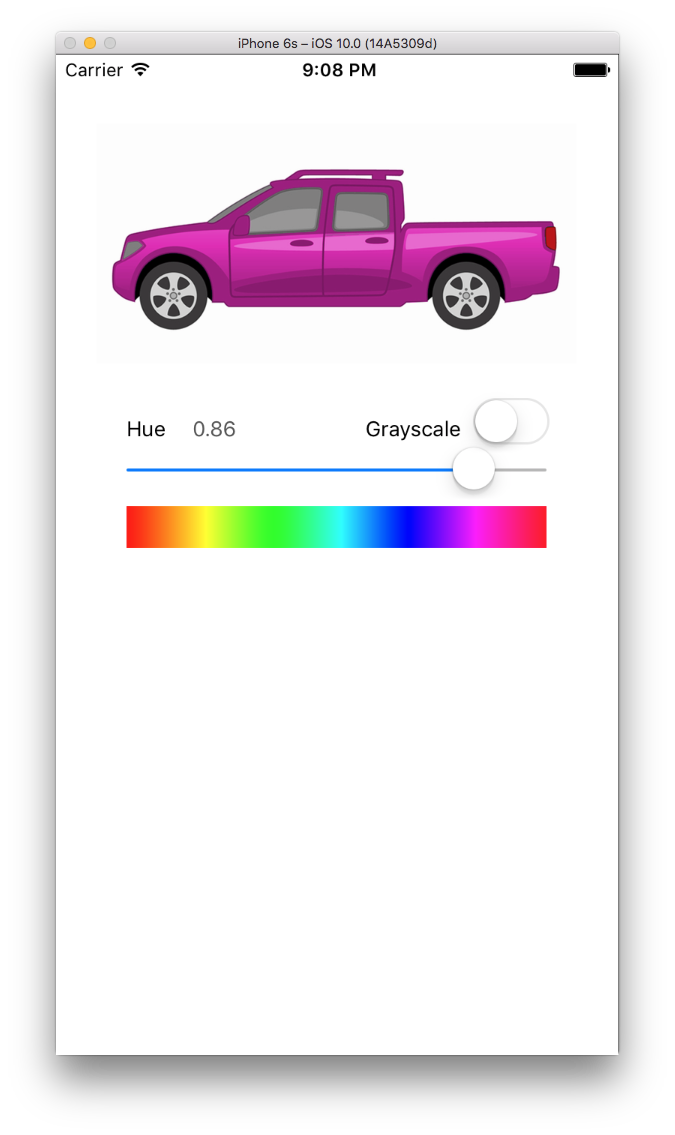
I made a quick app that replaces a default blue truck below, with whatever you choose on Hue slider.
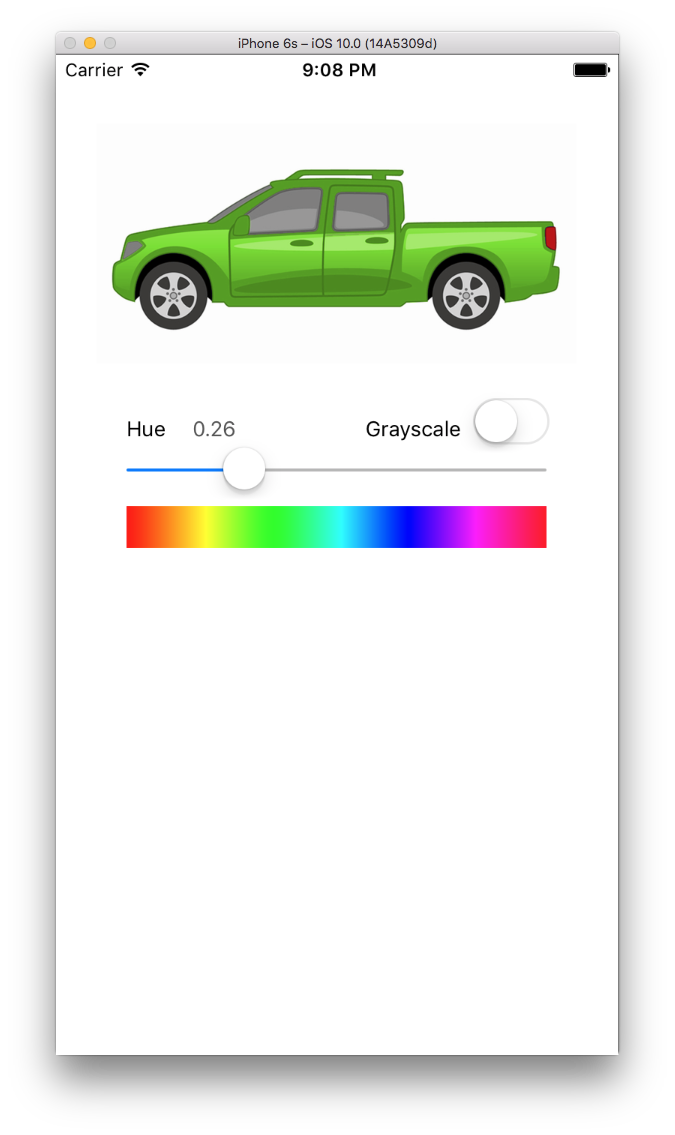
You can slide the slider to tell the app what color Hue you want to replace the blue with.
I’m hardcoding the Hue range to be 60 degrees, which typically seems to encompass most of a particular color but you can edit that if you need to.
Notice that it does not color the tires or the tail lights because that’s outside of the 60 degree range of the truck’s default blue hue, but it does handle shading appropriately.
First you need code to convert RGB to HSV (Hue value):
func RGBtoHSV(r : Float, g : Float, b : Float) -> (h : Float, s : Float, v : Float) {
    var h : CGFloat = 0
    var s : CGFloat = 0
    var v : CGFloat = 0
    let col = UIColor(red: CGFloat(r), green: CGFloat(g), blue: CGFloat(b), alpha: 1.0)
    col.getHue(&h, saturation: &s, brightness: &v, alpha: nil)
    return (Float(h), Float(s), Float(v))
}
Then you need to convert HSV to RGB. You want to use this when you discover a hue that in your desired hue range (aka, a color that’s the same blue hue of the default truck) to save off any adjustments you make.
func HSVtoRGB(h : Float, s : Float, v : Float) -> (r : Float, g : Float, b : Float) {
    var r : Float = 0
    var g : Float = 0
    var b : Float = 0
    let C = s * v
    let HS = h * 6.0
    let X = C * (1.0 - fabsf(fmodf(HS, 2.0) - 1.0))
    if (HS >= 0 && HS < 1) {
        r = C
        g = X
        b = 0
    } else if (HS >= 1 && HS < 2) {
        r = X
        g = C
        b = 0
    } else if (HS >= 2 && HS < 3) {
        r = 0
        g = C
        b = X
    } else if (HS >= 3 && HS < 4) {
        r = 0
        g = X
        b = C
    } else if (HS >= 4 && HS < 5) {
        r = X
        g = 0
        b = C
    } else if (HS >= 5 && HS < 6) {
        r = C
        g = 0
        b = X
    }
    let m = v - C
    r += m
    g += m
    b += m
    return (r, g, b)
}
Now you simply loop through a full RGBA color cube and “adjust” any colors in the “default blue” hue range with those from your newly desired hue. Then use Core Image and the CIColorCube filter to apply your adjusted color cube to the image.
func render() {
    let centerHueAngle: Float = 214.0/360.0 //default color of truck body blue
    let destCenterHueAngle: Float = slider.value
    let minHueAngle: Float = (214.0 - 60.0/2.0) / 360 //60 degree range = +30 -30
    let maxHueAngle: Float = (214.0 + 60.0/2.0) / 360
    var hueAdjustment = centerHueAngle - destCenterHueAngle
    let size = 64
    var cubeData = [Float](count: size * size * size * 4, repeatedValue: 0)
    var rgb: [Float] = [0, 0, 0]
    var hsv: (h : Float, s : Float, v : Float)
    var newRGB: (r : Float, g : Float, b : Float)
    var offset = 0
    for var z = 0; z < size; z++ {
        rgb[2] = Float(z) / Float(size) // blue value
        for var y = 0; y < size; y++ {
            rgb[1] = Float(y) / Float(size) // green value
            for var x = 0; x < size; x++ {
                rgb[0] = Float(x) / Float(size) // red value
                hsv = RGBtoHSV(rgb[0], g: rgb[1], b: rgb[2])
                if hsv.h < minHueAngle || hsv.h > maxHueAngle {
                    newRGB.r = rgb[0]
                    newRGB.g = rgb[1]
                    newRGB.b = rgb[2]
                } else {
                    hsv.h = destCenterHueAngle == 1 ? 0 : hsv.h - hueAdjustment //force red if slider angle is 360
                    newRGB = HSVtoRGB(hsv.h, s:hsv.s, v:hsv.v)
                }
                cubeData[offset]   = newRGB.r
                cubeData[offset+1] = newRGB.g
                cubeData[offset+2] = newRGB.b
                cubeData[offset+3] = 1.0
                offset += 4
            }
        }
    }
    let data = NSData(bytes: cubeData, length: cubeData.count * sizeof(Float))
    let colorCube = CIFilter(name: "CIColorCube")!
    colorCube.setValue(size, forKey: "inputCubeDimension")
    colorCube.setValue(data, forKey: "inputCubeData")
    colorCube.setValue(ciImage, forKey: kCIInputImageKey)
    if let outImage = colorCube.outputImage {
        let context = CIContext(options: nil)
        let outputImageRef = context.createCGImage(outImage, fromRect: outImage.extent)
        imageView.image = UIImage(CGImage: outputImageRef)
    }
}
You can download the sample project here.